Quantcast
Channel: Search Results for “nail clinic”– Nailpro
Viewing all 665 articles
Browse latest View live

Give Clients Long-Lasting Color with SNS Gelous Dipping PowdersGive Clients Long-Lasting Color with SNS Gelous Dipping Powders


China Glaze x Naomi Yasuda for Opening Ceremony x DisneyChina Glaze x Naomi Yasuda for Opening Ceremony x Disney

$
0
0

On Wednesday, Opening Ceremony threw an epic Mickey Mouse-themed fashion show inside Disneyland’s Toontown for the label’s Spring 2018 presentation and surprise debut of its Disney collaboration collection. China Glaze sponsored the nails for the show, teaming with nail artist Naomi Yasuda (@naominailsnyc) to create two magical designs.

“For the nails at the Opening Ceremony show, there was only one way to take the nail and that was full-blown Mickey,” Yasuda said. “His iconic silhouette can be seen in the Spring 2018 collection so I weaved that into the nails for the first show, and then went full-blown color with the nails specifically for the surprise Mickey collection show. The color combinations play off the way Opening Ceremony show Mickey in their designs – that good style and fun go hand in hand.”

Like Walt Disney’s early sketches of Mickey, Yasuda created a classic black and white design using black cream Liquid Leather and White On White cream, then put a bold spin on the famous face and ears using a mix of new shades from China Glaze’s Spring 2018 collection plus a sneak peek at a new shade from its Summer collection. From a subtle black peak on a white nail to a Mickey face complete with 3D ears, every model’s nails paid homage to the Mouse.

Watch the video below get a backstage look at the inspiration behind the designs.

What do you think of these Mickey manicures? Let us know in the comments below!

-Sigourney Nuñez

[Images courtesy of China Glaze]

The post China Glaze x Naomi Yasuda for Opening Ceremony x Disney appeared first on Nailpro.

How to Customize Nail Forms for Challenging Types of NailsHow to Customize Forms for Challenging Types of

$
0
0

To create a natural-looking and durable set of sculptured nails, using a form is essential—and getting the right fit is crucial. “Perfecting your form-fitting technique will mean the difference between a structurally strong nail that will last until the next fill and having a little groove in the side of the nail,” says Cheralyn Phaneuf, an educator for Indigo Nails in Campbell River, British Columbia, Canada. “If the form is not properly fit, the nail will grow out and that groove will become a weak point and break under pressure or get caught in the client’s hair or clothes—and if the client is a picker, she will likely pick away at that spot until it breaks.”

Getting that flawless fit can sometimes be exasperating, especially when dealing with “imperfect” nail shapes. “A lot of technicians have trouble fitting forms properly because clients’ nail shapes and fingers are all so different, and the round shape of the form opening doesn’t always match up to the client’s nail,” notes Los Angeles-based nail artist and Young Nails senior mentor Sabella Snyder. That’s why it’s often necessary to custom-fit the forms according to clients’ natural nail shapes. “Forms should fit nice and tight to avoid slipping, and there shouldn’t be any gaps,” says Phaneuf. “If the sides are properly placed, the middle line on the form should be at the middle of the nail.”

If your form isn’t fitting perfectly, take a look at the shape of the client’s nail bed, as well as at the hyponychium (where the skin of the finger and underside of the nail’s free edge meet). Then, grab some scissors or nippers (Phaneuf especially likes curved eyebrow grooming scissors) and trim the form to fit. Here, Snyder prescribes simple strategies for tailoring your forms to fit square nail beds, wide nail beds and nails with an extended hyponychium.

Square Nail Beds

When clients have square nail beds, the biggest challenge is ensuring that the center of the form is as secure as the corners. “Especially if the client is a nail-biter—more than likely she has bitten off her hyponychium—the center of the nail will need the most support when creating an extension on a square nail bed,” notes Snyder. “You want to create that same square edge to go up to the nail, so that there aren’t any gaps.”

1. Remove the center insert from the form. Then, cut across the insert to create a straight edge.

2. Once it’s cut, reapply the center insert with the sticky side up, right above the opening.

3. Place the form on the finger, making sure it’s straight and secure.

Extended Hyponychium

Clients with long nail beds often dread form application because of their extended hyponychium. For these clients, forms may feel tight or even painful—but cutting a small “V” can help to eliminate any discomfort. “The higher the hyponychium, the deeper the cut will need to be,” says Snyder. “It all depends on the client—some will have an extended hyponychium, but not as much as others. Some even extend past the fingertip, and in that case, you would want to make the cut even deeper.”

1. Take out the center of the form and reapply it at the base of the form, sticky side up.

2. Use nippers or small scissors to cut a small “V” up to the very first line of the form, depending on how extended the hyponychium is.

3. Apply the form to the finger, making sure that the entire free edge of the nail is touching the form, paying close attention to the center of the nail. (If the “V” is too deep, there will be a visible space.)

Wide Nail Beds

The secret to applying extensions to wide nail beds—particularly thumbs or even toenails—is using two forms instead of one. “If you get a really wide toe or thumb, a regular form won’t work, so it’s just easier to put two together for that one nail that happens to be extra wide,” Snyder says.

1. Take two forms, then cut three lines to the left of the center of one form, and three lines to the right of the center of the other form.

2. Line up the right form to the main center line of the left form.

3. Pop out the centers of both forms and place them on the back of the double form, sticky side up, to help ensure that the forms do not come apart.

4. Separate the top tabs and cut off the jagged pieces on the base of the opening to create a smooth, straight line.

5. Apply the new double form to the finger, making sure that the entire free edge of the nail is touching the form.

Watch the video below to see how Snyder customizes the nail form for wide nail beds.

What’s your best advice for customizing nail forms? Let us know in the comments below!

The post How to Customize <span class="search-everything-highlight-color" style="background-color:orange">Nail</span> Forms for Challenging Types of <span class="search-everything-highlight-color" style="background-color:orange">Nails</span> appeared first on Nailpro.

TMG International x OPI for Pre-Oscars Luxury SuiteTMG International x OPI for Pre-Oscars Luxury Suite

$
0
0

TMG International hosted their 14th annual Pre-Oscar Beauty Suite keeping true to their metier with luxury and beauty activations at the TMG + Cirem Pre-Oscars Luxury Suite. OPI was on deck to offer manicures for the elite guest list at the Beverly Hills event.

Modern Family actress Aubrey Emmons-Anderson and comedian mom Amy Anderson receiving OPI Infinite Shine manicure by nail artists from The Nail Lounge in Beverly Hills.

.

Bronze Olympic Medalist Mirai Nagasu enjoying her OPI manicure by The Nail Lounge in Beverly Hills and picking out some polish from the OPI Infinite Shine collection.


TNT Claws actor Jimmy Jean Louis.

Netflix’s One Day At A Time actress Isabella Gomez and Marvels Runaway Actress Ariela Barer.

Missed the manicures that graced the Oscars red carpet? Click here for our roundup.

[Images courtesy of TMG International]

The post TMG International x OPI for Pre-Oscars Luxury Suite appeared first on Nailpro.

CND Vinylux Debuts Enhanced FormulaCND Vinylux Debuts Enhanced Formula

$
0
0

CND Vinylux—which boasts gel-like shine, seven-day wear and an easy removal process—now includes keratin, a protein shown to strengthen nails while enhancing their flexibility; vitamin E, an antioxidant with antiaging properties known to combat free radicals harmful to nail health; and jojoba oil to repair and revitalize nails. “Nail beauty begins with nail health,” says CND cofounder and style director Jan Arnold. “The enhanced formula delivers the perfect balance of color, efficacy and care for a lasting gel-like shine, now with even more benefits.” The long-wear polish features a two-step system consisting of a color coat and a top coat infused with cellulose acetate butyrate and ProLight technology. All 137 Vinylux shades are available in the new formula.

For more information, visit cnd.com.

[Image courtesy of CND]

The post CND Vinylux Debuts Enhanced Formula appeared first on Nailpro.

Polished Look: Spring’s Laven-DarePolished Look: Spring’s Laven-Dare

$
0
0

Spring is finally here, and with it comes a new palette of colors to dominate the season’s fashions and, of course, nail polishes. But the hue that reigned supreme on the catwalks wasn’t your typical warm-weather vivid pink or hot yellow; instead, the shade du jour, lavender, spoke quiet volumes—whether dusty and delicate (as seen at Max Mara) or brilliant and luminescent (as seen at Tom Ford). The sublime pastel, a toned-down variation of 2018 Pantone Color of the Year Ultra Violet, seems poised to knock millennial pink off of its pedestal, giving nail art lovers a shade they can partner with a slew of quirky hues to create manicure designs that serve up seriously on-trend beauty. Here, we pair spring’s freshest lavender polish picks with catwalk-approved colors and, with the help of resident NAILPRO nail artist Sigourney Nuñez, craft simple nail art designs that dare you to experiment with lavender.

Ultralight Lavender

Whisper-soft and cool, this hue buddies beautifully with an offbeat palette of colors—think: cognac, aqua, kelly green, teal and maroon.

Dusty Lavender

Warm in tone, this hue harmonizes with other neutral shades, like muted gray, blush, tan and sparkling cream, and makes a monochromatic impact with Pantone’s Ultra Violet.

Bold Lavender

As vivid as it is calming, this bright pastel plays the perfect partner to a gamut of colors, like hot pink, like-minded orchid, punchy peach, inky black and sandy beige.

What do you think of the lavender nail looks? Let us know in the comments below!

Guest artist Sigourney Nuñez is the digital content manager for NAILPRO and a nail tech in Los Angeles.

-by Karie L. Frost

This article was first published in the March 2018 issue of NAILPRO

[Images: fashion from Getty Images, nail art from Brooks Ayola]

The post Polished Look: Spring’s Laven-Dare appeared first on Nailpro.

Master Dip Application with SNS Academy LiveMaster Dip Application with SNS Academy Live

$
0
0

These days, there’s more competition than ever when it comes to attracting people to your salon. Expectations are high and customers demand quality. There’s no room to deliver mediocre services. Between endless salon choices and the internet—where people leave reviews and comments—potential clients have become very picky about where they go and what they want. So, if you want to stay ahead of the curve and make a name for yourself, you have to be the best at what you do.

The Hottest Trend

By now, most consumers have heard of dipping powders—the nail trend that may be one of the fastest growing in the beauty industry. Whether you’ve been offering dipping powder services for some time, or you’re brand new to the world of colored powder, it’s a great time to make sure you get the best training in the industry in order to ensure that you’re using the system correctly.

SNS, who introduced dipping powders to the industry, is now holding two-day live trainings through their SNS Academy. It’s an educational platform they’ve created to raise industry standards, help technicians deliver top quality service, and help business owners increase sales.

When you take a course with SNS Academy Live, you’ll receive the best hands-on experience and guidance around from the acclaimed masters of dipping powder technique. The training covers everything you need to know to complete a perfect set of nails, plus you’ll get tips and tricks that will take you the extra mile in quality and finish. The training includes a healthy lunch each day, and you get $650 value in free product, too.

Show Off Your Certificate!

You’ll leave SNS Academy Live with a certificate that shows the world you were trained by the #1 name in the industry. Raise your credibility and show clients you know exactly what you’re doing. Then, add your salon to the SNS Salon Finder—a new feature at snsnails.com that helps people find quality dipping powder services in their area. Maximum exposure and credibility through a trusted source might be just the ticket to take your business to the next level.

These days, there are many forms of polish, gel, dipping powders, and even salons, but too many customers suffer from undertrained technicians. Do you know the feeling of leaving a salon unsatisfied? We guarantee your clients do too. The only sure way to get customers coming back and sharing your service with friends and family is to be the best at what you do. It’s that simple.

For more information, visit snsnails.com.

READ MORE:

SNS Introduces GelStar in 150 New Colors

The Magic of Ombre: Dip into Nail Art with SNS

The post Master Dip Application with SNS Academy Live appeared first on Nailpro.

Nailspiration: 3 Disco-Inspired Nail Art Tutorials: 3 Disco-Inspired Art Tutorials

$
0
0


The luxe looks of the disco era take center stage on nails this season. Here, Los Angeles-based nail artist Elsy Pac, shares her disco-themed designs. “I was inspired by the shiny fabrics and textures that were popular during the’70s, including sequin dresses and disco balls.”

Step 1. Apply gel base coat, then two coats of silver holographic gel polish.

Step 2. Apply a line of clear gel down the center of the nail. Then, place large silver studs in the clear gel. Repeat until the entire nail is covered with studs.

Step 3. Apply a thin layer of clear gel over the edges of the studs. To finish, apply gel top coat.

Step 1. Prep the nail with gel base coat. Then, apply dots of shimmering pink, silver and gold gel polish to the nail. Do not cure.

Step 2. Apply a thin layer of clear gel, then use a gel brush to blend the gel polish shades together. To finish, apply gel top coat.

Step 1. Apply gel base coat. Next, use a striping brush to paint four diagonal lines with silver glitter gel polish.

Step 2. Apply clear gel to one of the diagonal sections. Do not cure. Use tweezers to place bronze sequins in the clear gel.

Step 3. Repeat Step 2 using gold, silver and bronze sequins until the entire nail is covered. Finish with gel top coat.

What do you think of these three nail art looks? Let us know in the comments below!

This article was first published in the March 2018 issue of NAILPRO

[Photography by Jason Bennett]

The post <span class="search-everything-highlight-color" style="background-color:orange">Nailspiration</span>: 3 Disco-Inspired <span class="search-everything-highlight-color" style="background-color:orange">Nail</span> Art Tutorials appeared first on Nailpro.


Guest Editor Maisie Dunbar Answers Your QuestionsGuest Editor Maisie Dunbar Answers Your Questions

$
0
0

Maisie Dunbar, nail tech, mentor, motivational speaker and  owner of The Maisie Dunbar Global Experience in Silver Spring, Maryland, joins NAILPRO this month to provide you with advice and answers to your nail questions.

Q. There are several nail salons near mine charging less for services, and I feel as though I’m losing some customers to them. How can I stay profitable and competitive without lowering my prices? —Courtney Luu, via email

A. The best way to stay profitable and ahead of the rest is to give your guests an awesome experience every time. To begin with, you want to be very consistent with your treatments, which means that you’re providing the service the same way each and every time. This way, clients can depend on you and know what to expect at their visits. It’s also important to create quality services using superior products. If you provide quality you have nothing to worry about. Finally, be on the cutting edge as a nail professional; incorporate new products and learn innovative techniques. When you give your guests what no one else does, then you can charge more for it, and they will continue to come back.

Q. I know that you work with many celebrities, and I’m trying to break into that business myself. Do you have any recommendations for how to get started? —Renee Rhodes, via email

A. The first step is to build a portfolio of your work—and not just nails you’ve done in the salon on clients; you want to show off your work on models. Look for fashion, beauty and lifestyle photographers in your area and volunteer your services. It’s very common for artists to do trade in order to build their book. That means no one gets paid and everyone, from the photographer to model to makeup artist, volunteers his or her services for the photo shoot. At the end, everyone receives the images. It’s a great way for those starting out to build a portfolio. Once you gain some traction on set and build your book, you can try signing with an agency to help you get work. Finally, in order to even consider working with celebrities, you have to live where they do. If you live away from the big cities, you likely won’t see many A-list celebrities coming your way. But don’t forget local celebrities (think: news anchors, politicians and athletes); working with them can be a great stepping stone to something bigger.

Do you have any questions for Maisie Dunbar? Email it to nailpro@creativeage.com! To get more advice from Dunbar, click here.

This article was first published in the March 2018 issue of NAILPRO

The post Guest Editor Maisie Dunbar Answers Your Questions appeared first on Nailpro.

Savvy Salon: Bellacquer Nail StudioSavvy Salon: Bellacquer Studio

$
0
0

Bellacquer Nail Studio owners Kiem Lam and Nickie Le open the doors to their Beacon Street Nail Salon.

Distinction

We have both been in the nail industry for a long time, and thus have spent time honing and developing our craft. We relied on our experience, passion and focus to build a studio that truly exemplifies expert nail service, safety and creativity. Bellacquer Nail Studio encompasses our long-time vision for a space that captures the art of nail care. We put a lot of thought into designing our studio. From finding the right materials to having the best sanitation practice and building the right team, no detail was spared in the planning process. We want to send a message that we demand excellence when it comes to our clients’ needs.

Clientele

Our clients are a mix of mostly women and some men who take their nail care routine seriously. Most of our clientele know exactly what they want when they come into our studio, and more often than not, will challenge us with even more unique requests. We see our clients as our partners who support and push us to continue providing superior service. We believe that giving excellent nail service takes time, so our appointments can last an average of one hour to an hour and 15 minutes, and our clients spend an average of $47 per visit.

The Look

Bellacquer is located in Coolidge Corner, which is a vibrant and diverse neighborhood in Brookline, Massachusetts. In terms of its physical location, Bellacquer Nail Studio is centrally located bordering six Boston neighborhoods. The population is made up of a mix of college students, young professionals and families. Overall, we could not have asked for a better location. The studio is designed with clean lines and subtle contrasts of muted colors and textures. We wanted a minimalist look to highlight our wall of more than 1,000 artfully arranged polish colors. We used white quartz throughout the studio and chose an Italian ceramic tile with rustic wood texture for the floors.

In-Demand Services

Our most popular service is the gel manicure. This service is priced at $39 or $44 if removal of previous gel polish is required. This service includes everything in our classic manicure, including pushing back cuticles and trimming nails, along with nail shaping. We then apply gel polish, available in more than 800 unique shades, and guarantee our clients a no-chip manicure for at least two weeks. We complete the service with a warm towel followed by a relaxing hand massage.

The Goods

We primarily use OPI and Essie, and keep all of their latest collections in stock. Many of our clients are familiar with these two brands and enjoy the ease of finding their favorite colors. OPI has the most extensive selection of colors and the most beautiful shades of red, while Essie has the best selection of natural shades that can complement any look. In addition, we also carry Dazzle Dry and Bio Seaweed Gel. For clients who are looking for something different, LeChat Mood Gel is a super fun and creative line that changes colors depending on the temperature. We’re always researching and looking to expand our collection.

Social Media

Since our work is highly visual, we use Instagram to display our flawless work and to connect with our clients directly.

Praise

We consider a returning client and client referrals as the best compliments we can get. These actions showcase the appreciation of our studio
and team.

Advice

It’s important to focus on your vision, ambition and growth strategy for your salon. We recognize that running a successful studio requires not only hard work, but more importantly, dedicated team members who believe in the vision and continue to set industry standards—and we believe in always keeping our eyes open for current trends, as well as setting new trends.

For more information, visit bellacquer.com.

This article was first published in the March 2018 issue of NAILPRO

[Images courtesy of Kiem Lam]

The post Savvy Salon: Bellacquer <span class="search-everything-highlight-color" style="background-color:orange">Nail</span> Studio appeared first on Nailpro.

VIDEO: Young Nails Shows How to Prevent LiftingVIDEO: Young Shows How to Prevent Lifting

$
0
0

Application is key, but the majority of the problems when it comes to lifting can be traced back to not preparing the natural nail correctly, says Habib Salo, president of Young Nails. To help prevent this service breakdown, the pro brand’s educator Tracey Reierson shows how to properly prep the nails for any service in the video below.

For more tutorials from Young Nails, check out the brand’s YouTube channel here.

What’s your best advice to avoid lifting? Let us know in the comments below!

-Sigourney Nuñez

READ MORE:

Young Nails No-Sculpting Nail Extension Technique

Beauty File: Get to Know Habib Salo

Learn How to Use Young Nails Mission Control for Nail Art

The post VIDEO: Young <span class="search-everything-highlight-color" style="background-color:orange">Nails</span> Shows How to Prevent Lifting appeared first on Nailpro.

Polish by SandSpa Opens in Manhattan Beach, CAPolish by SandSpa Opens in Manhattan Beach, CA

$
0
0

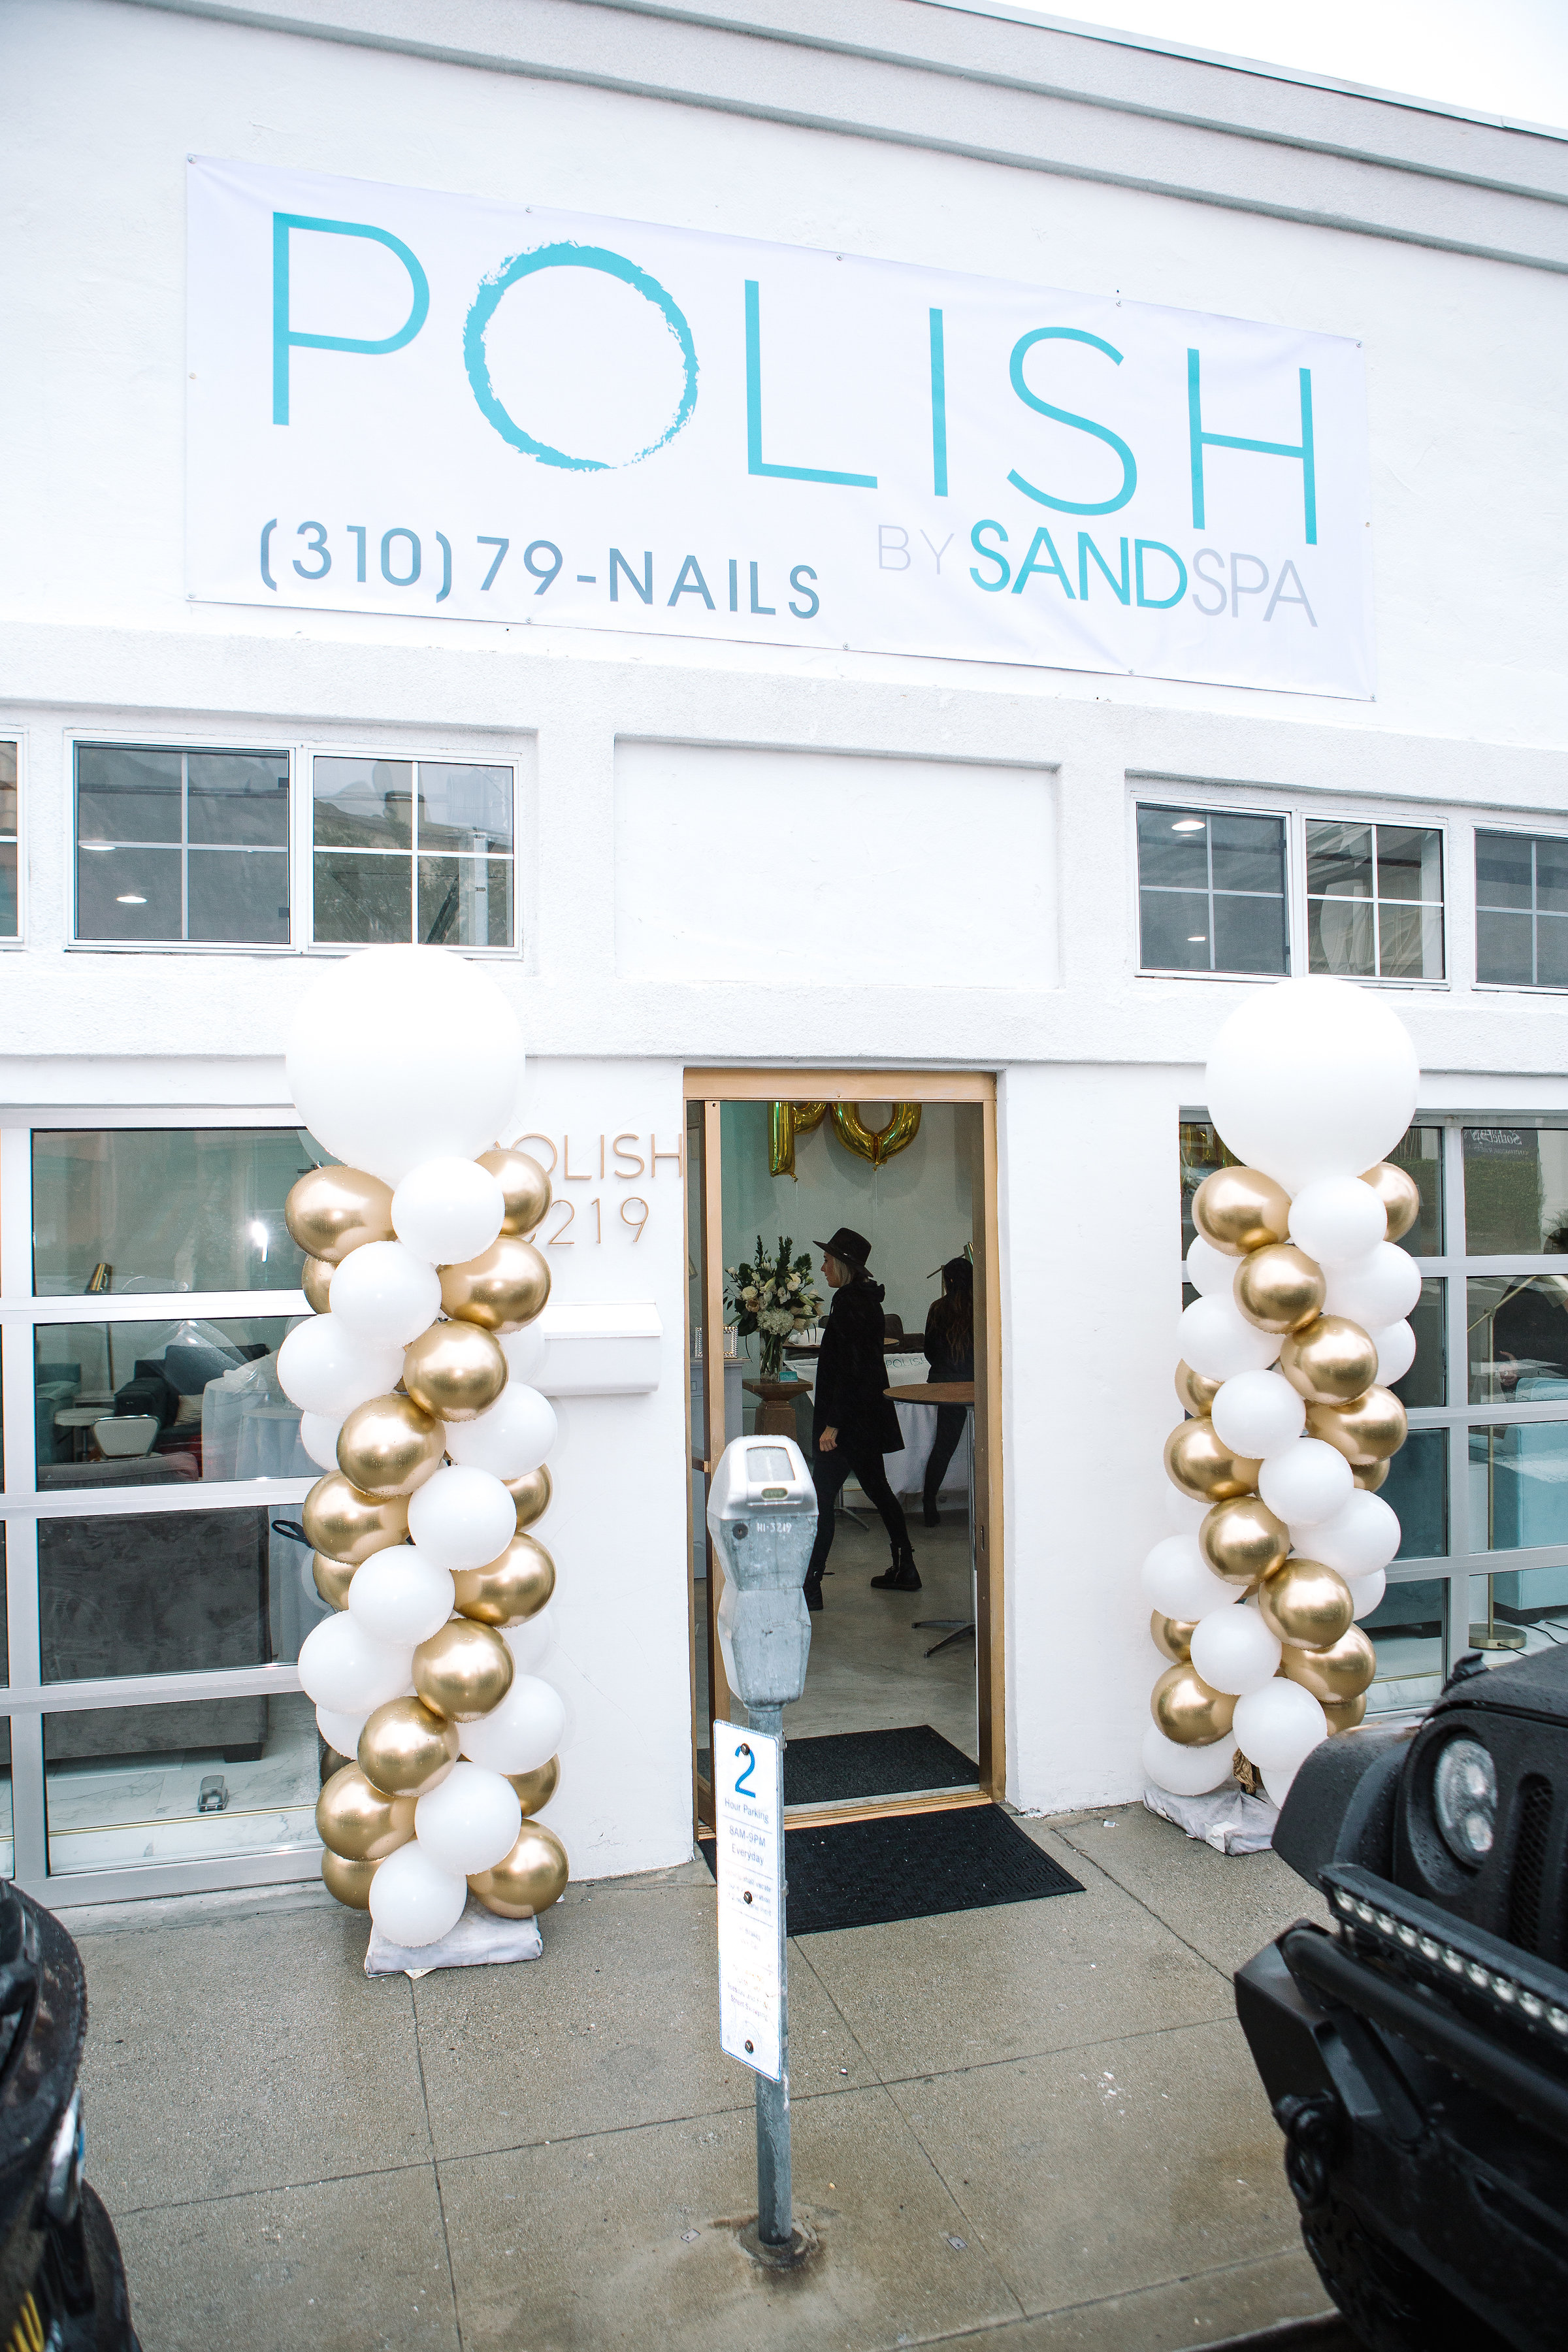
Exterior of Polish by SandSpa at it’s Manhattan Beach, CA location

When owners Megan Richardson and Gretchen Tierman learned that some of their clients travel from Manhattan Beach to Hermosa Beach to spend the day at their day spa, SandSpa they knew that opening another location was a necessity. “We were listening to our clients talk about driving here specifically to see us at SandSpa,” explains Tierman, “and everyone loves a manicure. So we decided to open a nail salon in Manhattan Beach so our clients wouldn’t have to drive anymore.”

Owners Megan Richardson and Gretchen Tiernan

Courtesy of Polish by SandSpa

Polish by SandSpa held it’s grand opening on March 22 at it’s new location on Highland Ave. in Manhattan Beach. Guests were treated to a DJ, taco bar, manicures and refreshments while getting acquainted with the new salon and it’s beach-y, neighborhood feel. A braid bar was set up by Primp Lounge, guests may get a quick hairstyle done while they waited for a one of a kind nail art manicure by celebrity nail artist Britney Tokyo.

NAILPRO Assistant Editor Dina Ciccarelli receiving a manicure by Britney Tokyo as owner Megan Richardson observes

“We wanted to bring in local vendors for the opening to create a local feel and vibe for the salon,” Tierman explained. Flowers were provided by Rolling Hills Flower Mart, wine was supplied by West Side Wine Co. and sweets were provided by Beckers Bakery. The salon is located a block away from Manhattan Beach and the front facing walls of the salon are actually garage doors, so in the summer clients can smell the sea while receiving a service. The walls of the salon are white, while teal accents are placed throughout the salon to create a serene beach ambiance, there is also a gorgeous bubbled chandelier when you first walk in that plays with the under the sea vibe.

Courtesy of Polish by SandSpa

Clients are offered a range of nail services provided at Polish by SandSpa. Including a classic mani or pedi, hard gel enhancements, nail art and of course, massages. “We really feel like we’ve grown up with the opening of this salon,” Richardson told NAILPRO assistant editor, Dina Ciccarelli. “When we opened our first location [SandSpa] we were 23, and now with the opening of this salon [Polish by SandSpa] we feel like we have grown up and have more creative control of our business.”

Courtesy of Polish by SandSpa

You can visit Polish by SandSpa at 3219 Highland Ave. Manhattan Beach, CA 90266 or reach them at 310.796.2457 or by visiting sandspamb.com 

The post Polish by SandSpa Opens in Manhattan Beach, CA appeared first on Nailpro.

Get the Look: Nautical Nail Art by EssieGet the Look: Nautical Art by Essie

$
0
0

Celebrity manicurist and Essie global lead educator, Rita Remark, has created a nautical nail art look using three shades from the spring 2018 collection, Hook, Line and Sinker. Follow the steps below for smooth sailing.


1. Start by applying First Base base coat, then polish a diagonal French tip with a striping brush using Pass-port to Sail

2. Dip a small detail brush in Anchor Down and polish quick, diffused dashes from the side of the nail to the middle

3. Repeat step 2 with At the Helm but on the other side of the tip, moving upwards and to the middle of the nail and make sure to leave the middle. Finish with Essie Setter top coat .

For more inspiration from Essie, visit their website here.

-Sigourney Nuñez

READ MORE:

Backstage Wisdom from Rita Remark

The post Get the Look: Nautical <span class="search-everything-highlight-color" style="background-color:orange">Nail</span> Art by Essie appeared first on Nailpro.

Video: Acrylic Cut Out Technique by Young NailsVideo: Acrylic Cut Out Technique by Young

$
0
0

Creating negative space by cutting out acrylic requires very specific timing, says Habib Salo, president of Young Nails. In the video below, watch Greg Salo create a chevron design using an acrylic cut out technique.

For more tutorials from Young Nails, check out the brand’s YouTube channel here.

What are your thoughts on this acrylic cut out technique? Let us know in the comments below!

-Sigourney Nuñez

READ MORE:

Young Nails No-Sculpting Nail Extension Technique

Beauty File: Get to Know Habib Salo

VIDEO: Young Nails Shares Top Tips to Prevent Lifting

The post Video: Acrylic Cut Out Technique by Young <span class="search-everything-highlight-color" style="background-color:orange">Nails</span> appeared first on Nailpro.

VIDEO: Celina Ryden Shows 5 Ways to Do a FrenchVIDEO: Celina Ryden Shows 5 Ways to Do a French

$
0
0

Light Elegance just launched two new products: Ideal White and Ideal Pink, designed to help you create a perfect pink-and-white set. In the video below, brand ambassador Celina Ryden shares five different techniques to create a French tip using the new gels.

What’s your favorite way to execute a French? Let us know in the comments below!

-Sigourney Nuñez

[Image courtesy of Instagram @celinaryden]

READ MORE:

Celina Ryden Launches Nail Art Brushes in Collaboration with Light Elegance

How to Use Light Elegance ButterCream

Plaid Perfection: Nail Art using Light Elegance

Tutorial: Light Elegance Fuzzies

The post VIDEO: Celina Ryden Shows 5 Ways to Do a French appeared first on Nailpro.


The Making of the April 2018 CoverThe Making of the April 2018 Cover

$
0
0

Featuring a combination of encapsulated and three-dimensional designs, coupled with the juxtaposition of matte and glossy finishes, the nails on this month’s cover reflect techniques that are trending in Mexico and Central America right now. To create the contrast, Mia Secret international master educator Blanca Martinez
(@blancamartinezzzz) sculpted narrow square nails, and then added a pastel watercolor background. When Martinez is working in the salon, she keeps client functionality top-of-mind, so for the cover nail designs, she chose to embed most of the 3-D elements (roses and a unicorn), because inlaid designs are less likely to get caught on hair or clothing. To complete the look, she topped the set with plenty of rhinestones.

Follow the steps below to recreate the look:

1. Martinez began by fitting a form and then extending the nail with white acrylic. Next, she created a watercolor effect by layering wet beads of pastel color acrylic across the nail.

2. Once set, she used small beads of pastel acrylic to sculpt roses down the length of the nail.

3. Next, Martinez encapsulated the entire design in clear acrylic. (Keep the 3-D design flush to the nail to avoid a bulky appearance.)

4. After shaping and filing the nail, Martinez removed the excess dust and applied gel top coat.

5. To create added dimension, she sculpted two more flowers and petals on the surface of the nail.

6. To finish, Martinez used resin to adhere rhinestone accents just above the flowers at the cuticle area.

For a more in-depth look at how Martinez created the nails, watch the video below.

What do you think of these pastel cover nails? Let us know in the comments below!

-Sigourney Nuñez

This article was first published in the April 2018 issue of NAILPRO

READ MORE:

How-To: Mia Secret Plastiline

The post The Making of the April 2018 Cover appeared first on Nailpro.

How-To: Zoya Kisses Pastel JelliesHow-To: Zoya Kisses Pastel Jellies

$
0
0

Create dimension and design with the new Kisses Pastel Jellies polish collection from Zoya. The sheer colors are buildable, allowing for a variety of color and depth options.

1. Prep the nail and apply Anchor Base Coat. Apply two coats of opalescent Leia. Let it dry completely.


2. Apply various pieces of striping tape across the nail to create triangle patterns.


3. First apply white Purity* to the inside of triangles. Then, layer Princess, Vickie and Libby on top to continue creating the design.


4. Once the polishes are completely dry, gently lift the tape off of the nail. Then, add dots around the design with Purity. Finish with Armor Top Coat.

For more information, visit zoya.com.

What do you think of this nail art look? Let us know in the comments below!

-written by Dina Ciccarelli

This article was first published in the March 2018 issue of NAILPRO


The post How-To: Zoya Kisses Pastel Jellies appeared first on Nailpro.

Meet Tom Holcomb Inspiration Award Winner Karin StromMeet Tom Holcomb Inspiration Award Winner Karin Strom

$
0
0

Excellence. Passion. Dedication to the industry. These are just some of the qualities that are embodied by recipients of the Tom Holcomb Inspiration Award. NAILPRO Competitions director Jewell Cunningham established the award in 2013 to honor the late great nail industry icon, innovator and competitor Tom Holcomb, who passed away in 2012. “Tom taught us perfection and how to accomplish it,” explains NAILPRO Competitions head judge Carla Collier.

When it comes to finding just the right person to carry on Holcomb’s legacy, it can be a grueling process. “Carla and I make a list of people our industry admires,” says Cunningham. “Then we see who has made an impact on other techs, is amazingly skilled and has a good reputation.” Ultimately, they look for someone who embodies Holcomb’s spirit and inspires people to want to do and be better.

This year, that shining star is Karin Strom, nail artist, educator and international competitor from Gothenburg, Sweden. Strom’s passion for nails is contagious, inspiring everyone around her, from students to her own daughter Jessica. (Check out the pair’s work on the upcoming May cover of NAILPRO!) Being honored with this award was a poignant moment for the artist. “I knew Tom; we met several times and had a lot of fun at competitions and classes all over the world,” Strom says. “Receiving this prize means the world to me—more than any other trophy I’ve won during my competition career.”

READ MORE:

NAILPRO Competitions Judges Reveal the Best Sets and Worst Mistakes They’ve Ever Seen

The post Meet Tom Holcomb Inspiration Award Winner Karin Strom appeared first on Nailpro.

Iconic Money Nails Now Exhibiting at Museum of Modern Art in New YorkIconic Money Now Exhibiting at Museum of Modern Art in New York

$
0
0

ITEMS: Is Fashion Modern?

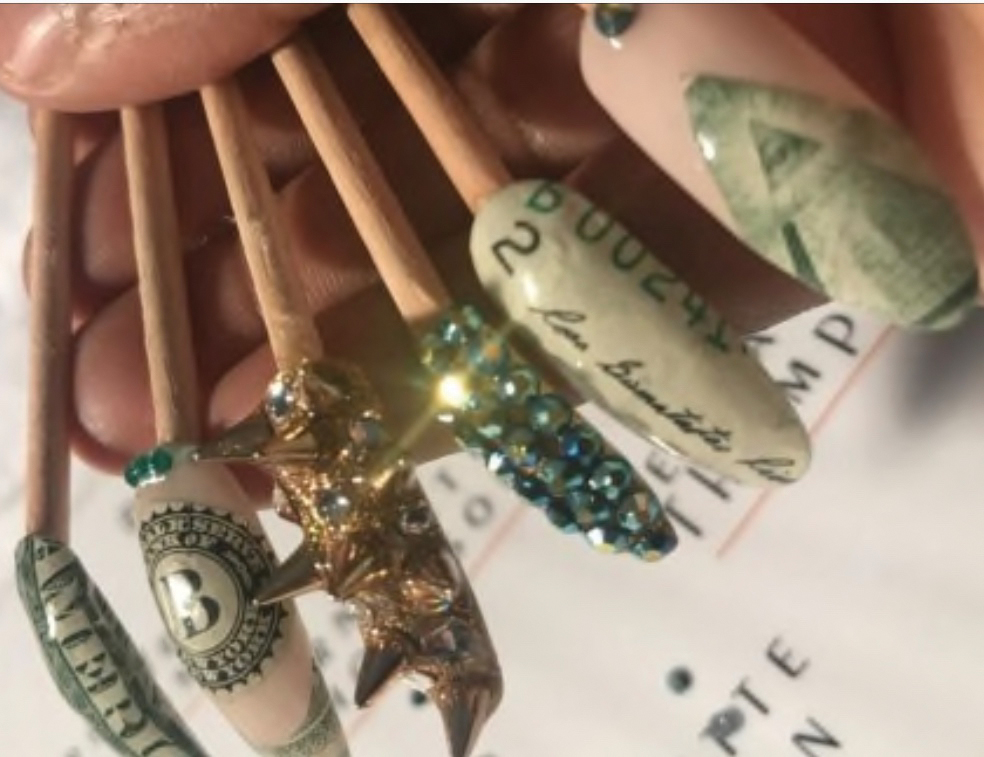
Editorial and celebrity nail tech Bernadette Thompson’s iconic “money nails,” which she created for rapper Lil’ Kim in the mid-’90s, got another moment in the spotlight when a replica appeared in the recent Items: Is Fashion Modern? exhibit at the Museum of Modern Art in New York. The exhibit featured more than 100 fashion and beauty pieces considered to have made a strong impact on the world in the 20th and 21st centuries. The nail artist also created a collection of money nail appliqués for purchase at the museum store.

Thompson, whose nail art designs have graced the fingertips of countless A-listers over the years—including Missy Elliott, Mary J Blige, Lady Gaga and Taylor Swift—created Lil’ Kim’s original money nails look by cutting up real U.S. currency and applying the pieces on the nails. Thompson’s technique, also featured in Vogue magazine, instantly put her talents in high demand, but it also landed her in hot water with the U.S. Treasury Department, who called her directly to issue a warning, explaining that defacing U.S. currency is a federal offense. “I had started getting requests for phone interviews every day, and I didn’t realize I was on the phone with the U.S. Treasury Department; they let me go on and on about how I cut up the money before telling me who they were!” she laughs.

Thompson (left) with recording artist M.I.A.

Now the Museum of Modern Art has made Thompson’s money nails part of their permanent collection, and Thompson’s nail appliqués are available to all on her website, bernadettethompson.com. “They’re made out of 100-percent nail polish, and they look identical to real money,” she says.

Thompson’s money nails appliqués.

Thompson is also opening The B Nail Experience and Beauty Lounge later this month, a members-only luxury nail salon in Scarsdale, New York, her home base. With several levels of membership tiers to choose from, guests can receive a set number of services per month. Says Thompson, “My goal is to open locations everywhere around the country where members can go to get their nails done.”

What do you think of these money nails? Let us know in the comments below!

-Lotus Abrams

[Photos courtesy of getty images/Patrick mcmullen; Martin Seck/The Museum of Modern Art; Armando Sanchez]

This article was first published in the April 2018 issue of NAILPRO

The post Iconic Money <span class="search-everything-highlight-color" style="background-color:orange">Nails</span> Now Exhibiting at Museum of Modern Art in New York appeared first on Nailpro.

VIDEO: 3 Festival Nail Art TutorialsVIDEO: 3 Festival Art Tutorials

$
0
0

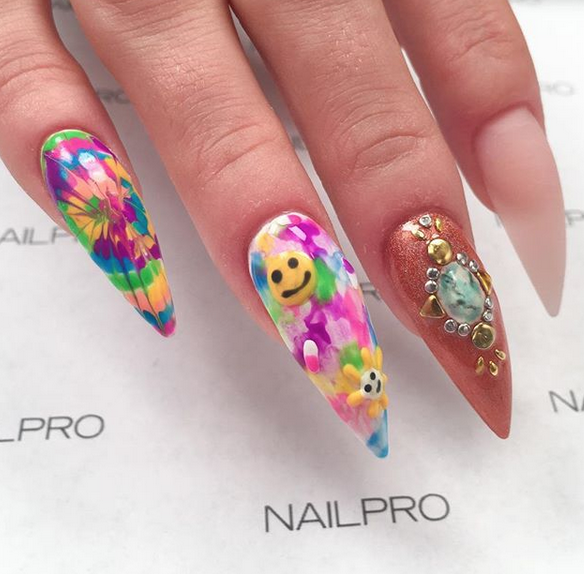
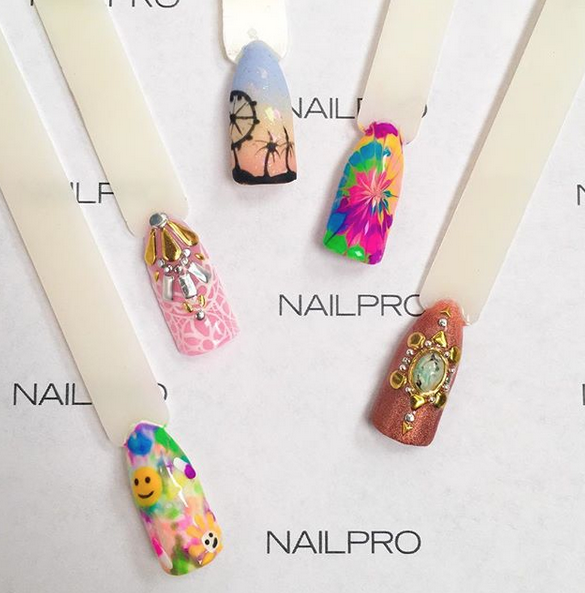
Festival season is officially here! To help you and your clients get ready with trendy nail art designs, we tapped LeChat nail artist Yvett Garcia (@yvynails) to show three cool looks that will be perfect all spring and summer long.

Watch the Facebook Live video below to learn how to recreate two neon nails and one boho blinged out design.

What do you think of these festival nails? Let us know in the comments below!

-Sigourney Nuñez

READ MORE:

Festival Nails from MARS the Salon


The post VIDEO: 3 Festival <span class="search-everything-highlight-color" style="background-color:orange">Nail</span> Art Tutorials appeared first on Nailpro.

Viewing all 665 articles
Browse latest View live


Latest Images